Canvas Mode
Canvas is for validating a look across several images at once and for building a look from a stack of LUTs. Instead of one hero image you get a board of reference images, all graded by the same LUT stack.
note
Canvas is a Pro feature. In Standard the mode switch offers an upgrade.
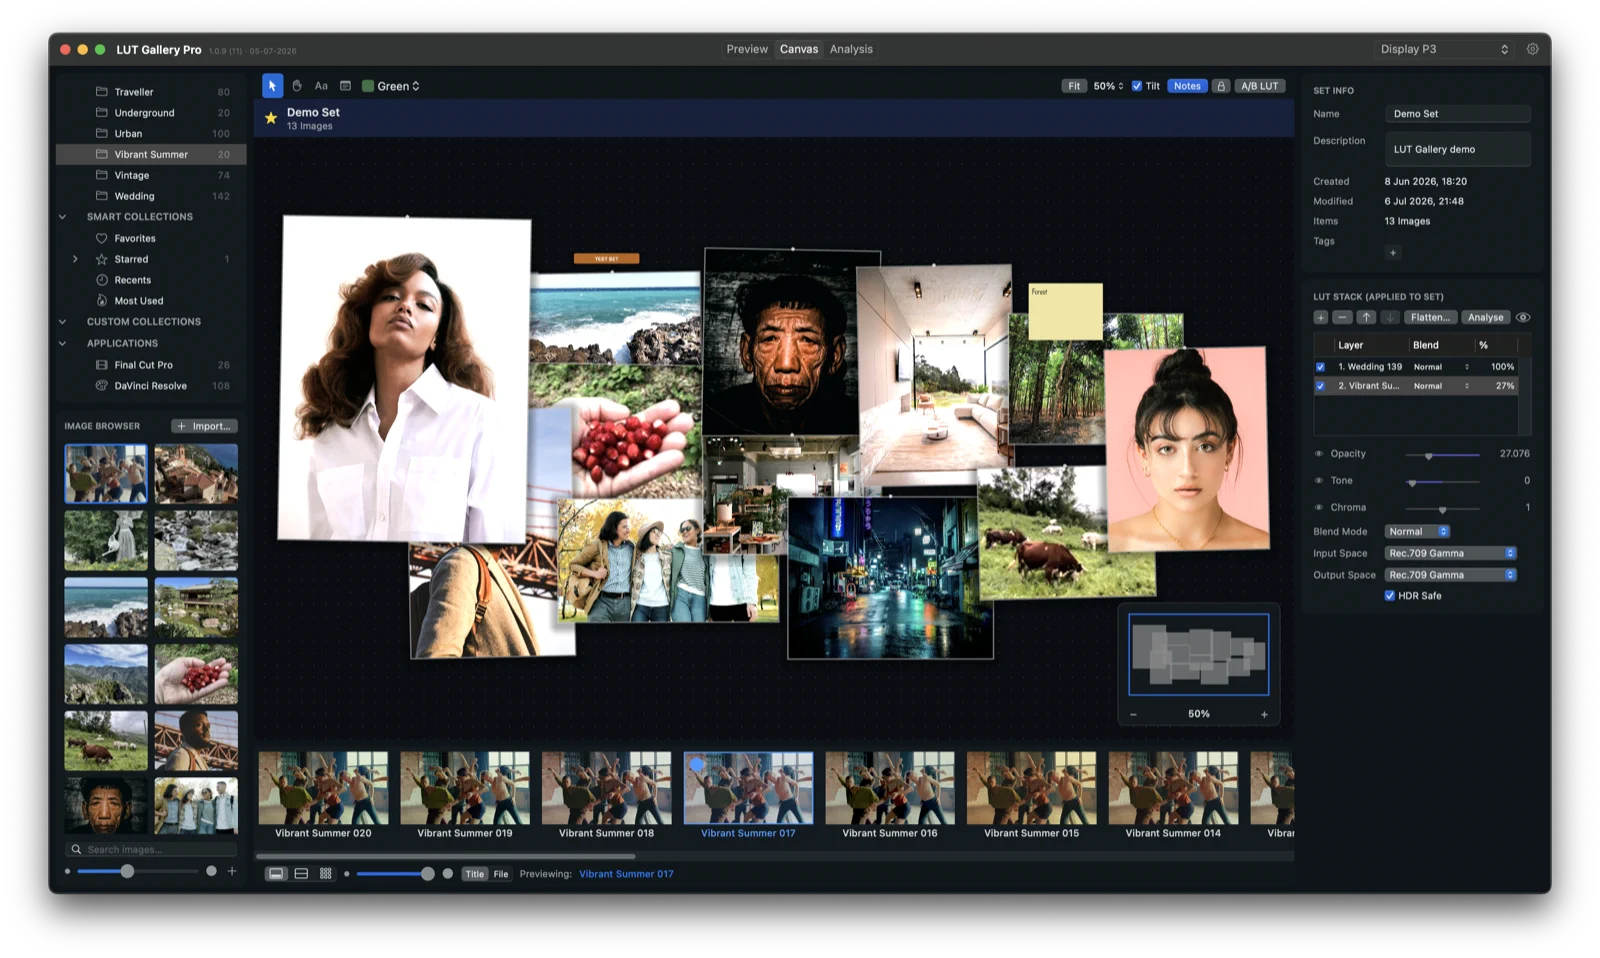
The board
- Drag images onto the board (or use the film strip / +) to build a reference set — portraits, skies, skin tones, neutrals, whatever you validate against.
- Pan the board by dragging; it stays top-anchored as the window resizes.
- The whole board updates live as you change the stack.
Board tools & annotations
The toolbar across the top of the board carries the board tools and view toggles:
| Control | What it does |
|---|---|
| Select (arrow) | Default tool — click to select cards, drag to move/resize. |
| Hand | Pan the board (you can also hold Space with any tool). |
| Group label (T) | Click the board to drop a chip — a small coloured label to group references. |
| Note | Click the board to pin a sticky note for annotations. |
| Note colour | The colour used for the next note / chip. |
| Fit + zoom | Frame the whole board, or pick a zoom preset. |
| Tilt | Toggle the subtle pinboard tilt on the image cards. |
| Notes | Show/hide all notes and chips. |
| Lock | Lock the board so cards can’t be moved, resized or deleted. |
| A/B LUT | Load a .cube and split every card to compare it against the live stack (see below). |
Notes and chips are board annotations — they belong to the set, not to the images, and deleting one removes only the annotation.
Source colour space (per image card)
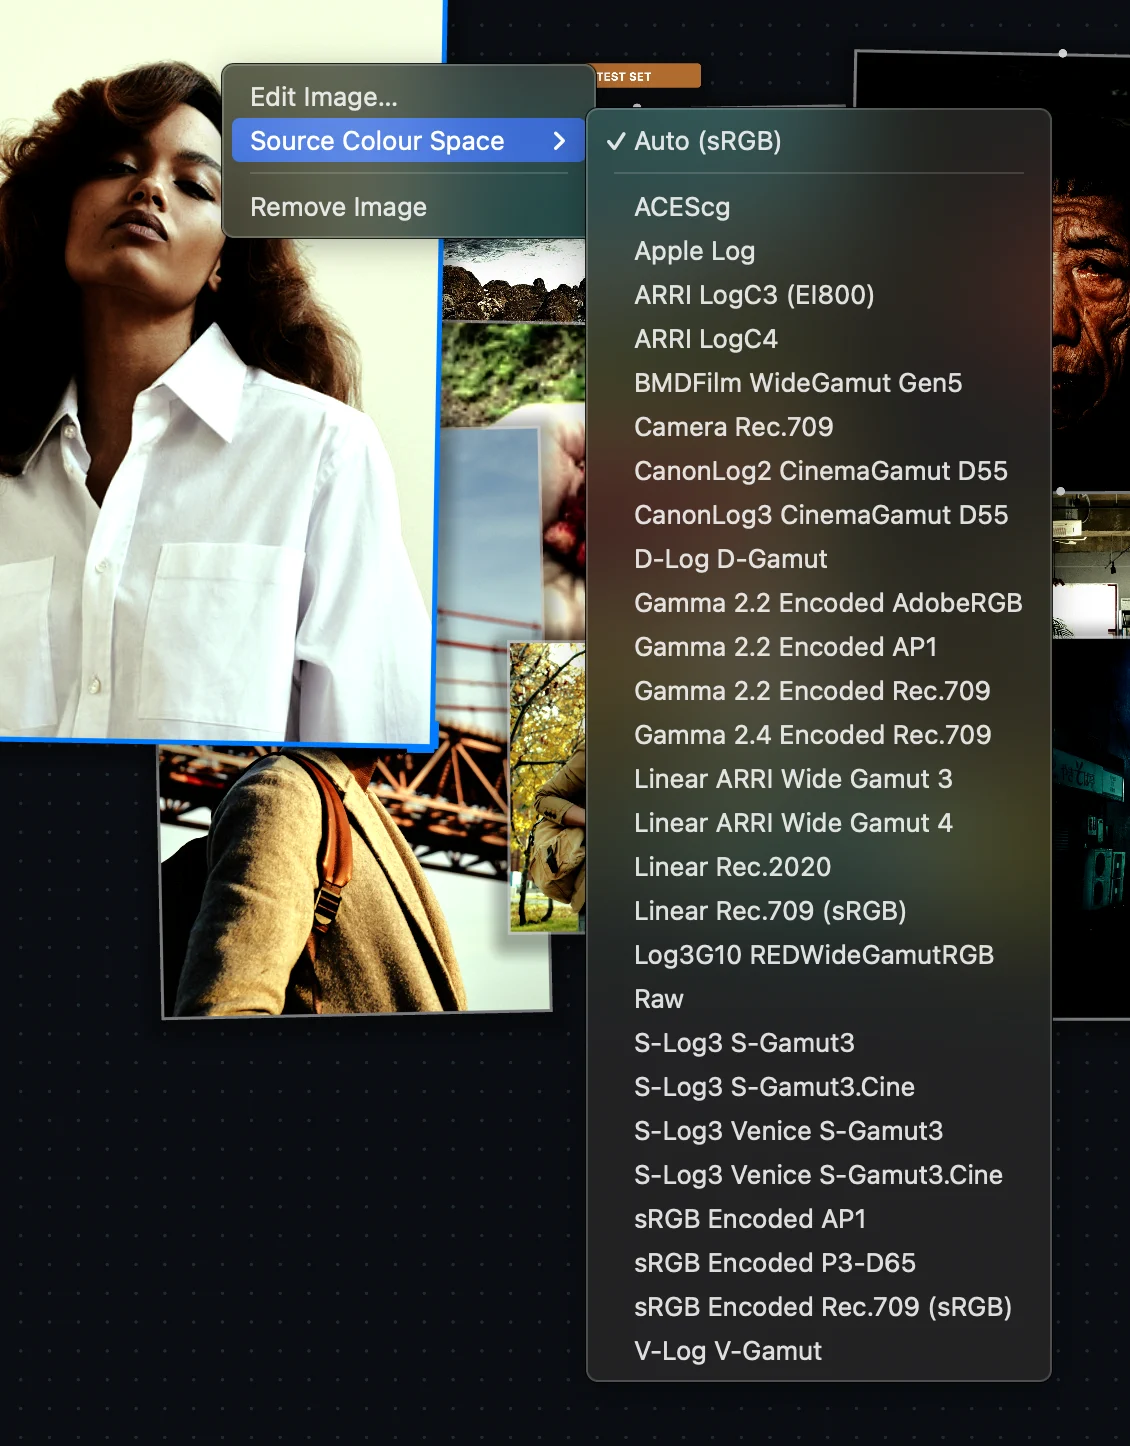
Each image card declares the colour space its footage is in, so the engine decodes it correctly before the look stack. Right-click a card → Source Colour Space:
- Auto (sRGB) — the default; the image is treated as a normal display-space still.
- A camera / log space — the list comes from your active OCIO config: camera spaces (ARRI LogC, RED Log3G10, Sony S-Log3, Panasonic V-Log, …) in a simple config, or IDTs in an ACES config. Pick the one that matches the clip and it’s decoded through OCIO into the working space before grading.
tip
Camera footage doesn’t require ACES. With a plain display output selected, choosing a camera Source Colour Space still decodes the log/camera footage correctly (via OCIO) and shows it with a normal sRGB/Rec.709/P3 output. ACES mode adds the full IDT → ACES → ODT path on top. See Colour Management.
The same right-click menu also has Edit Image… (open the clip in the Inspector’s grade controls) and Remove Image.
Set Info
The right Inspector’s Set Info card shows details about the current set (image count, notes). Use it to keep reference sets meaningful.
The LUT Stack (Applied to Set)
The core of Canvas. The stack applies one or more LUT layers, bottom to top, to every image on the board.
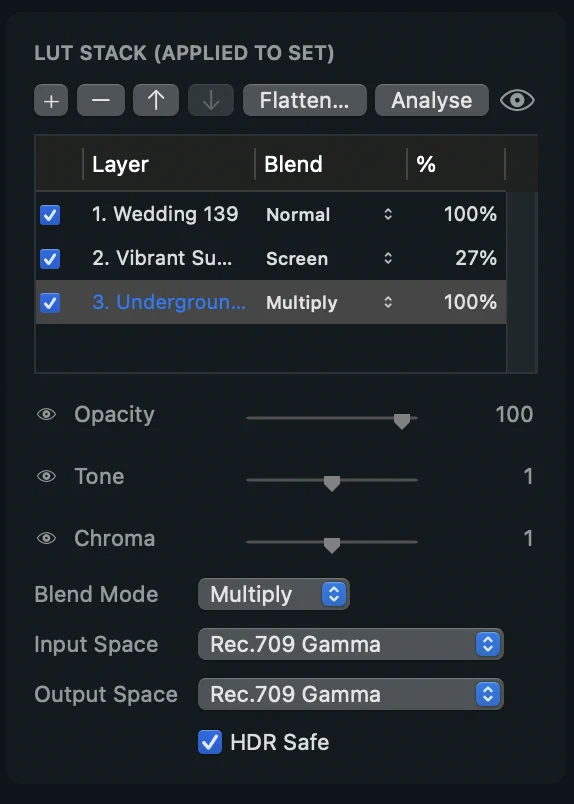
Adding & ordering layers
- Click a LUT in the library/film strip:
- if the stack is empty → it becomes layer 1;
- otherwise → you’re offered Add as New Layer.
- + adds an empty pass-through layer.
- − removes the selected layer.
- ↑ / ↓ reorder layers (order changes the result — layers composite bottom→top).
Per-layer controls
Each layer row carries the controls that define how it’s applied:
| Control | Meaning |
|---|---|
| Opacity | Blend strength of this layer, 0–100 %. |
| Blend Mode | How the layer combines with what’s below: Normal, Multiply, Screen, Overlay, Soft Light. |
| Tone | Scales the layer’s effect on luminance (perceptual, OkLab) — how much it shifts brightness/contrast. |
| Chroma | Scales the layer’s effect on colour (OkLab) — how much it shifts hue/saturation, independent of tone. |
| Input Space | The colour space the LUT expects its input in. |
| Output Space | The colour space the LUT produces. |
| HDR Safe | Protects highlights from clipping when the LUT is pushed in HDR spaces (a tone-mapped sandwich around the LUT). |
Colour-space options (per-layer Input/Output): Rec.709 Gamma,
Rec.2020 Gamma, Rec.2020 PQ, Rec.2020 HLG, Rec.2020 Linear,
S-Log3 / S-Gamut3.Cine. Set these to match how the LUT was authored so it lands
in the right space. (This is distinct from a card’s Source Colour Space
above, which is how the footage itself is decoded.)
Stack actions
| Action | What it does |
|---|---|
| Bypass all layers (eye) | Momentarily shows the ungraded board so you can compare. While bypassed the stack table dims so the state is obvious. Bypass is a preview only — it’s never saved. |
| Reset the stack | Click the LUT Stack section header (it reads Reset on hover) to clear the stack — removes every layer and lifts any bypass. |
| Flatten… | Bakes the entire stack (all layers, blend, tone/chroma, spaces, opacity) into a single new .cube on the GPU and imports it — one LUT that reproduces the whole stack. |
| Analyse | Opens Analysis Mode on the selected layer’s LUT. |
Auditioning a LUT in the stack
Browsing looks without committing:
- Single-click a LUT → it temporarily replaces the selected layer (you’ll see an "◂ audition" marker). Click another to keep browsing.
- Double-click → commit that LUT to the layer.
- Switching selection, changing rows or leaving Canvas reverts an un-committed audition.
This lets you flip through hundreds of LUTs in a layer slot and only keep the one you want.
A/B LUT compare
The A/B LUT button loads a single .cube and splits every card on the
board: the left half shows your live look stack, the right half shows the
loaded LUT. It’s built for verifying a bake — flatten your stack, load the
result with A/B LUT, and a correct bake shows no seam down the middle of any
card.
Removing images
Delete a selected card (Delete key, or right-click → Remove Image) and you’re asked what to remove:
- Remove from Canvas — takes the card off the board only.
- Remove Everywhere — also removes the image from the film strip and library (offered when the image is in your pool).
The original files on disk are never touched. Notes and chips delete immediately (they’re board-only).
Saving & sharing a Canvas
Your Canvas is auto-saved and restored between launches. To keep a named copy
or share one, export it as a portable .lgcanvas document:
| Action | How |
|---|---|
| Export Canvas… | File → Export Canvas… (⇧⌘E) — writes the whole board (LUT stack, images, notes, chips, positions) to a .lgcanvas file. |
| Open Canvas… | File → Open Canvas… (⇧⌘O), or double-click a .lgcanvas in Finder — loads it as the current Canvas. |
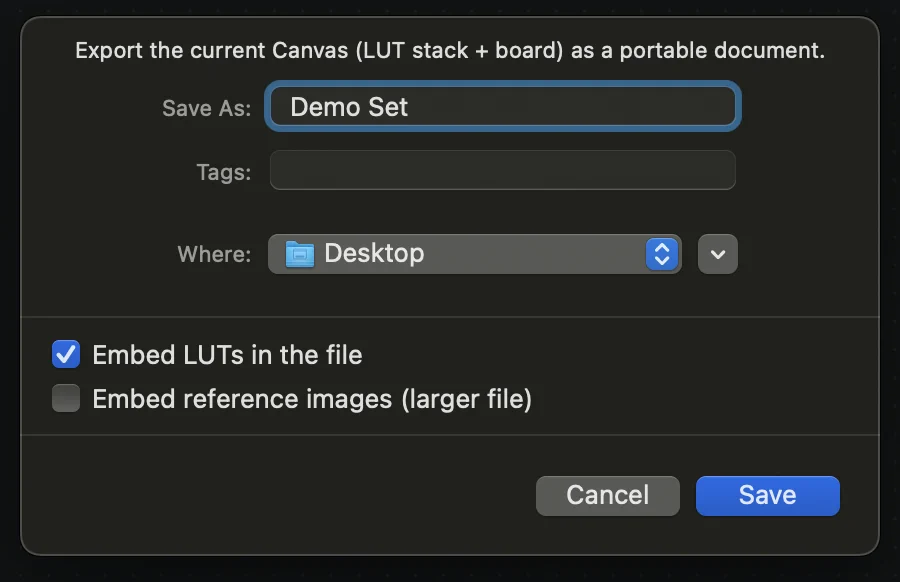
When exporting you choose what travels with the file:
- Embed LUTs in the file (on by default) — the look always reloads, on any
Mac, even without the original
.cubefiles. - Embed reference images (off by default) — bundle the photos too, so the file opens identically anywhere. Larger file; leave off to store the images by reference (re-linked by path).
.lgcanvas is a plain, versioned JSON document — portable and machine
independent (it stores no per-Mac paths that would break on another machine).