Interface Overview
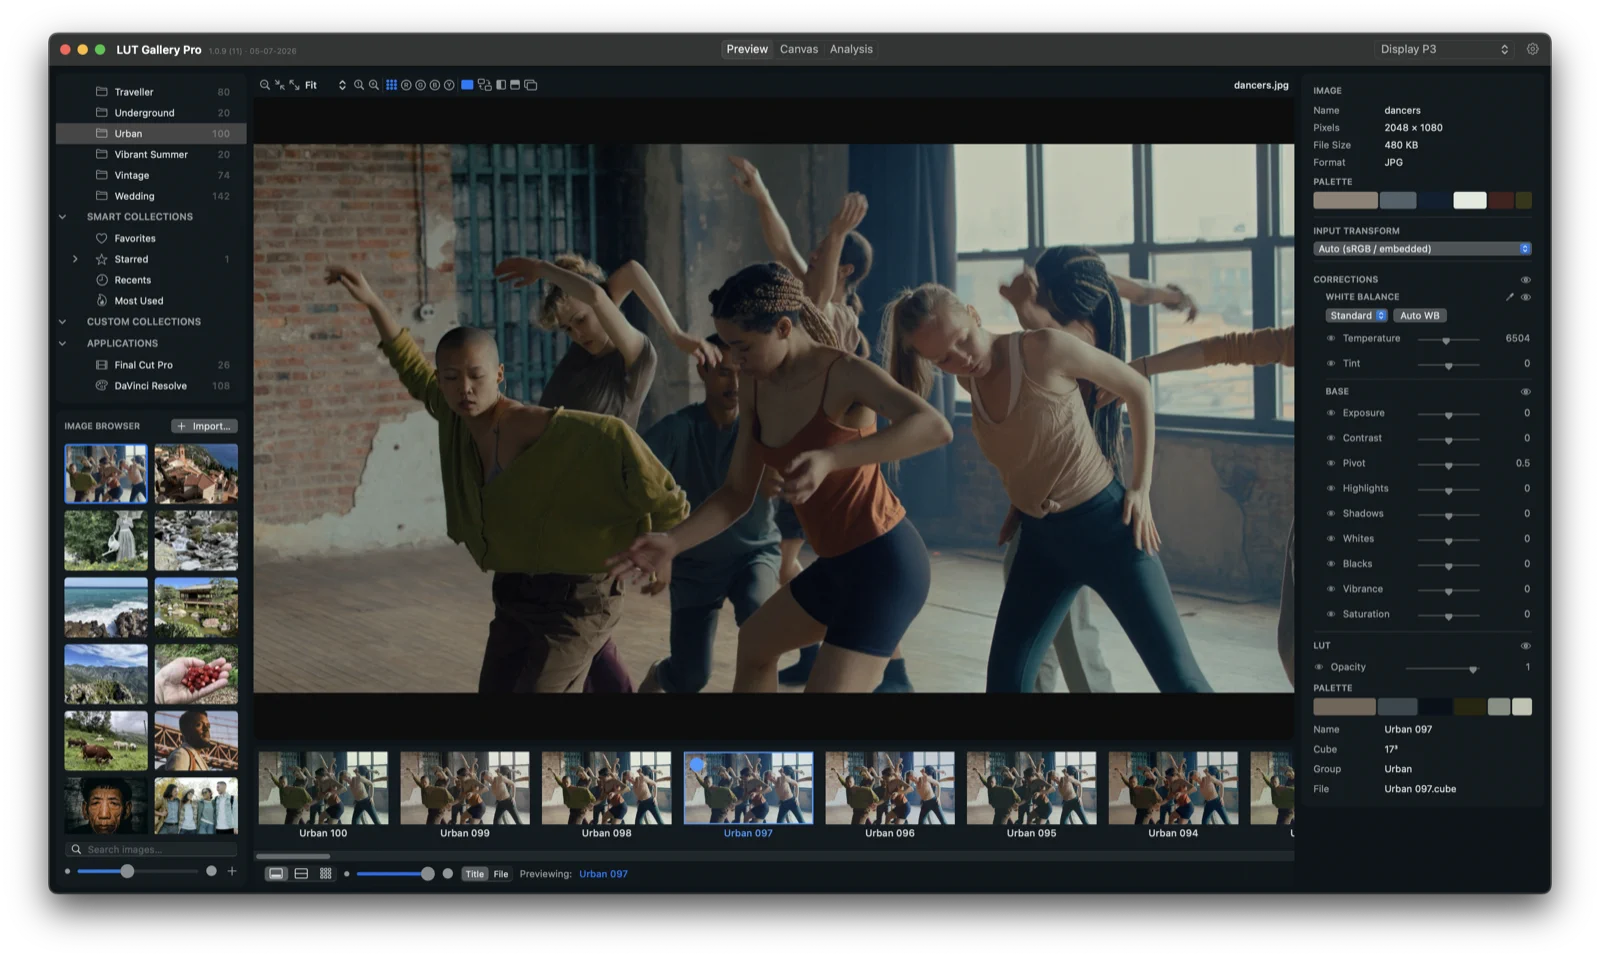
The window is the same shape in every mode — only the centre changes:
| Region | Where | What it is |
|---|---|---|
| Mode switch | Title bar (centre) | Preview · Canvas · Analysis. |
| Viewer header | Above the centre image | Zoom, channel and compare controls (Preview). |
| Left sidebar | Left | Two cards: the LUT Library and the Image Browser. |
| Centre | Middle | The hero image (Preview), the reference board (Canvas) or the 3-D analysis view (Analysis). |
| LUT film strip | Bottom | Your current image rendered through every LUT in the library. |
| Inspector | Right | Context-sensitive controls for whatever is selected. |
| Gallery bar | Below the film strip | View-mode switch (Filmstrip · Split · Full), the thumbnail-size slider, a Title / File label toggle, and “Previewing:”. |
Mode switch
The title-bar segmented control picks the mode:
- Preview — one image, audition LUTs, grade it.
- Canvas — a reference set, validate a look across several images.
- Analysis — inspect the selected LUT’s behaviour.
Switching modes keeps your current image and LUT selection, so you can jump between auditioning, validating and analysing the same look.
The Inspector is contextual
The right-hand Inspector follows the mode and selection. It has no tabs — the relevant sections are simply shown together:
- Preview → image info, the grade controls (Input Transform · RAW · White Balance · Base) and the applied LUT, stacked top to bottom.
- Canvas set → Set Info and the LUT Stack.
- Canvas image → the selected card plus the LUT Stack.
- Analysis → the selected LUT’s analysis cards (Information · Diagnostics · Semantic Tags · Actions).
You don’t switch it manually — it follows the mode and your selection.
The film strip is shared
The bottom film strip is the same in Preview and Canvas. It always shows the current image pushed through each LUT in the library, so you can see — not guess — what every look does before you pick one. It can expand into a full image/LUT browser (see Library & Importing).